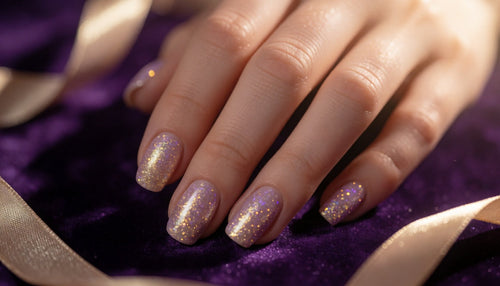
Christmas nails can go from restrained to full sparkle, and the best sets are planned rather than improvised. This guide covers six holiday looks you can recreate at home, from red chrome and glitter-dipped tips to stamped snowflakes and rhinestone accents. You'll also find advice on choosing a colour scheme, timing your manicure so it looks fresh on the day, and keeping a glittery set from snagging in your holiday knitwear.
Choose a Christmas Palette Before You Paint
Classic Christmas colours are red, green, white and gold, but you don't need all four. A single hero shade, such as deep cherry or forest green, with one metallic accent looks more refined than a rainbow of festive colours. Consider your outfits for the season and pick tones that sit well with them. Cool-toned skin looks lovely in blue-reds and emerald, while warm skin glows in brick red and olive. Decide whether you want a glossy, matte or chrome finish, and check how your chosen shades look together in daylight before you start. A tight palette makes the design look intentional and keeps the set wearable beyond the day itself. Take a quick photo of your swatches together, because colours that look balanced on screen are usually balanced on the hand as well.

Red Chrome for a Liquid Ruby Finish
Red chrome turns a standard red manicure into something glassy and jewel-like. Start with a black or deep red gel base, cure it, then seal with a no-wipe top coat and cure again. Rub red or ruby chrome powder into the surface with a silicone applicator until it reflects light, then brush away excess and seal with a clear no-wipe top coat. The finish looks richer over black, and warmer over deep red. Keep your layers thin and avoid wiping after sealing, since chrome streaks easily. For a softer feel, apply chrome only to the tips or an accent nail, leaving the rest in glossy plain red. Practise the rubbing motion on one nail first, since pressure and pattern affect how smooth the final mirror looks. Adjust your amount of powder if the finish looks cloudy.

Glitter Gradients Using Glitter Powder
Glitter powder gives a smooth, even sparkle without the grit of chunky glitter polish. Cure a base colour with a tacky top layer, then press glitter powder into the tips with a sponge or brush, tapping away the excess. Build the gradient by pressing more glitter at the free edge and less toward the cuticle. Seal with a thin no-wipe top coat to lock it in and smooth the surface. Gold glitter over burgundy feels warm and festive, while silver over navy looks wintry. Keep the glitter off your skin by using a small brush to remove any stray flecks before curing. Use a clean dry brush for each colour of glitter, because mixing metals can create a muddy effect, and keep a small tray under your hand to catch loose flecks and save them for reuse. Tap gently so the powder stays inside the gradient you drew.

Stamped Snowflakes and Winter Patterns
Stamping is the easiest route to detailed snowflakes, since you don't need to draw anything. Use white or silver stamping polish, pick a snowflake design from a plate, scrape it clean, and transfer it onto the nail with a silicone stamper. Work on a cured, no-wipe base so the pattern doesn't smear, and place the stamper gently without rolling it. Let the design dry for a few seconds, then seal with a top coat. Snowflakes look beautiful on navy, deep green or burgundy bases. Try one large snowflake on an accent nail and tiny scattered ones on the rest for a balanced, wintry look. If a stamped pattern looks patchy, wipe the plate, rescrape and try again with a little more polish, because thin images usually come from too little product.

Rhinestone and Pearl Accents
A few well-placed rhinestones turn a solid colour into a party nail. Place stones at the cuticle in a gentle curve, or cluster three small ones near the free edge. Use a dot of builder gel or rhinestone glue, press the stone down with a picker, cure and then seal around the edges of the stone with top coat, taking care to keep the stone's face clear. Gold or clear stones pair with red and green, while pearls bring a softer, vintage tone. Keep the placement away from areas that catch on knitwear, such as the very tip, and limit the stones to one or two nails per hand. A tiny amount of gel is plenty for every stone, because excess spreads under the edge and traps dust, and you can use tweezers or a picker to nudge each stone into its final position.

Matte Velvet and Cat-Eye Winter Looks
For a quieter holiday set, try a matte velvet red or a magnetic cat-eye in burgundy or emerald. Matte top coat turns any dark shade into velvet and makes small gold details stand out. For cat-eye, apply the magnetic gel, hold the magnet near the nail for a few seconds, then cure. The shimmer line catches the light as your hands move. Both finishes need very little drawing and work well for short nails. Avoid mixing too many textures on one hand, and choose one dominant finish with a single glittery accent. Keep the cat-eye magnet steady and close to the nail without touching the surface, then cure while holding the position so the line stays sharp. Move the magnet slowly from one side to the other if you want a broader, softer shimmer, and always check the effect before you start the cure.

Timing Your Manicure for the Holidays
Book or schedule your set two to three days before the occasion, so the polish is fresh but you've had time to fix any slips. Gel typically looks best for the first ten days, so if your holiday spans two weeks, consider doing a quick refresh or a new top coat. If you plan to travel or wrap gifts, choose a shorter length and avoid heavy 3D embellishments that may snag on paper and ribbon. Pack a small kit with a file, cuticle oil and a spare top coat for touch-ups. Plan the removal as well so your natural nails get a break before the new year. Keep your hands moisturised and your cuticles oiled in the days beforehand, since healthy skin makes the whole manicure look sharper in photographs.

Keeping Glitter and Charms From Snagging
Textured nails and knitwear are a risky combination. Seal glitter fully with two thin layers of top coat, running the brush along the edge of the nail to cap the free edge. File away any rough spots before sealing. If you use charms or stones, secure them with builder gel and trim any sharp edges. Choose smooth finishes on the nails you use most, usually the thumb and index finger, and save the heavy embellishment for the ring finger. Check your nails after you put on a jumper or coat, and use a nail file to smooth any new catch points quickly. A thin layer of top coat on the underside of the free edge can help too, since it keeps the weave of a sweater from catching on rough areas. Keep spare top coat on hand for quick repairs, and avoid picking at stones that feel loose.

Shop the products in this look:
How far in advance should I get my Christmas nails done?
Two to three days before the occasion is ideal. The set looks fresh and you have time to fix any small issues, while gel polish stays glossy for about ten days before a top coat refresh is worth doing.