Bubbles in gel polish usually show up after curing, when it's too late to fix them without redoing the coat. The cause is rarely the polish itself. It's almost always technique: air whipped into the bottle, a coat that's too thick, or a brush pressed down like a paintbrush on a wall. This guide separates the common culprits, shows how to recognise each one from the bubble's size and location, and gives you changes that you can make on your very next manicure.
Shaking the Bottle Is the Most Common Cause
Shaking a gel polish bottle feels natural, but it whips air into a thick liquid that has no easy way to release it. Those tiny air pockets travel onto the brush, onto the nail, and then expand under the lamp as the gel warms. Roll the bottle slowly between your palms for fifteen to twenty seconds instead. The movement mixes pigment without trapping air, and the warmth from your hands thins the gel slightly. If a bottle has been sitting with pigment settled at the bottom, rolling for a little longer works better than shaking harder. Let the bottle sit upright for a minute afterward so any bubbles that did form can rise to the surface before you load the brush.

Thick Coats Trap Air and Heat
A thick coat looks efficient, but gel cures from the top down, and the surface can set while the layer underneath is still liquid. Trapped air and solvent then push up and form bubbles or wrinkles. Two thin coats always beat one heavy coat. Wipe most of the gel off the brush on the bottle neck before it touches the nail, and aim for a layer you can almost see through. Dark colours are especially prone to this, because pigment blocks light and slows curing deeper in the layer. If a colour looks streaky after the first thin layer, that's normal. Cure it, then build coverage with a second pass. Check the coat from the side as you go; a thin layer should look almost translucent on the first pass.

Pressing Instead of Floating the Brush
Pressing the brush into the nail forces air out of the bristles and into the gel. The better technique is to float the brush, letting the bead of polish do the work while the bristles barely touch the surface. Place the bead near the cuticle, push it gently toward the skin line, then pull it down the nail in one confident stroke. Avoid going back and forth over the same area, because every extra pass whips in more air. If you notice a bubble forming as you paint, don't chase it with the brush. Let the coat settle for a few seconds, and most small bubbles will rise and flatten on their own before you cure. Wait for a quarter of a minute between strokes if you need to go back over a patch.

Dust, Moisture and Oil Under the Polish
Bubbles that appear in the same spot on several nails often come from the prep rather than the polish. Moisture or oils left on the nail plate turn to vapour under the lamp's heat and lift the gel in little domes. After filing, brush off dust with a clean brush, wipe each nail with a lint-free pad and a dehydrator, and avoid touching the surface afterward. Even hand cream applied hours earlier can leave enough residue to interfere. Check your base coat as well. If it's old, thickened or has dust floating in the bottle, you'll see tiny speckled bubbles in the first layer and nothing you do on top will hide them. Give your nails a short rest after filing so any warmth and surface oils settle before the base coat.

Curing Mistakes That Create Bubbles
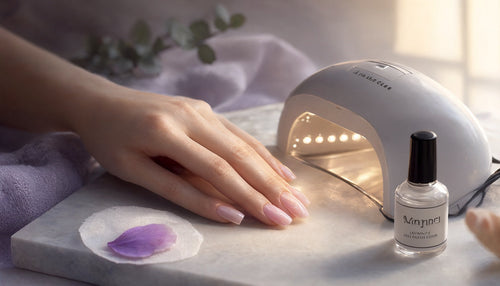
Under-curing and over-heating both cause trouble. If the lamp bulbs are old or the lamp is far weaker than the polish expects, the gel's surface can partially set while the layer below stays soft, which later forms bubbles or wrinkles. Check your lamp's wattage and wavelength against the polish instructions. On the other hand, a sudden heat spike from a thick layer in a strong lamp can make bubbles form in the middle of curing. If a nail starts to feel hot, pull your hand out for a few seconds, then continue. Cure thumbs separately, since their angle gets less light, and always follow the cure time stated for each product. Replace lamp bulbs or the whole lamp when cure times creep up, because weak light causes recurring faults.

Temperature and Humidity Matter More Than You'd Think
Gel that has been stored in a cold room becomes thicker and traps air more easily, while a humid space adds moisture to your nails. Keep your polishes at room temperature and let a cold bottle warm up before you start. If you're in a very humid environment, work with the window closed and a dehumidifier or fan nearby, and dehydrate the nail carefully before the base coat. Avoid doing your manicure straight after a shower, since nails absorb water and swell slightly, then shrink and let the gel lift afterward. A calm, dry surface and a stable bottle make every other technique tip more effective. Store bottles away from windows and radiators, since heat cycles thicken gel over time and invite air.

How to Fix a Bubble You Spot Before Curing
If you notice a bubble before the lamp, you can usually save the coat. Gently drag a clean, nearly dry brush across the area to lift the bubble, or tap the bubble with the tip of the brush so it pops and levels. Wait ten seconds for the gel to settle, then cure. If the bubble is still visible, don't pile on more polish. Instead, cure the layer as is, lightly file the raised area with a soft buffer, and add a very thin layer of colour or clear gel over the top. This approach is faster than removing the whole nail and avoids pulling away layers of natural nail. Whichever method you use, keep the brush and the surrounding cuticle clean so no stray gel cures onto the skin.

A Bubble-Free Routine to Follow Every Time
Put the pieces together and the routine is short. Roll the bottle, prep and dehydrate the nail, apply a thin base coat and cure it, then float on thin colour coats with a clean, lightly loaded brush. Cure each coat for the full time, cap the free edge, and finish with a thin top coat. If bubbles still appear, change one variable at a time, starting with the bottle, then coat thickness, then the lamp. Keeping a short note on what you changed makes it easy to spot the real culprit. Within a few manicures, most people find the bubbles disappear completely, and the finish becomes smoother than it ever was with shaking and thick coats. If you want faster results, practise on a single hand first and compare it with the other.

Shop the products in this look:
Why does my gel polish bubble after curing?
Bubbles usually come from air whipped in by shaking the bottle, coats applied too thick, or moisture left on the nail. Roll the bottle, apply thin coats and dehydrate the nail before the base coat, and most bubbles stop appearing.