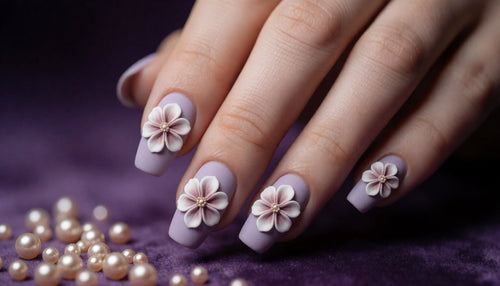
Caviar bead nails trade the usual flat or glossy manicure surface for something you can actually feel, tiny round micro-beads pressed into wet gel to create a textured, almost jeweled effect across the whole nail or just an accent. The look shows up constantly in trend roundups, but the application has a real technique behind it, and beads that aren't seated properly tend to shed within days. Here's how the finish actually comes together and stays put.
What Caviar Beads Actually Are
Caviar beads are tiny, uniform spheres, typically made from acrylic or resin, ranging from about 0.5mm to 1mm in diameter, sold loose in small jars sorted by color or finish. They're distinct from larger nail charms or pearls in that their small, consistent size is what creates the dense, textured 'caviar' effect when many beads are pressed closely together across a nail rather than placed individually. Because of their small size, beads are typically applied while a layer of gel is still wet and tacky, using either a gentle rolling motion with the nail itself or a dotting tool to press beads into place before curing locks them in. A single jar typically covers many manicures, since only a thin layer of beads is needed to achieve full coverage on any one set of nails.

Prepping the Base Layer for Bead Application
The gel layer beads get pressed into needs to be uncured, meaning wet and tacky rather than cured under a lamp, since cured gel has no tack left for beads to stick to. Apply your chosen base color, cure it fully first, then apply one additional thin layer of clear gel and leave it uncured; this is the layer that actually holds the beads. Working with an uncured layer means you have limited time, typically 60-90 seconds, before the gel starts to self-level and lose the texture needed to hold beads in place, so have your beads and application tool ready before you apply this final wet layer. Working on one hand at a time rather than prepping all ten nails first helps keep this window from closing before you've applied any beads at all.

Applying Beads Without Losing Coverage
Pour a small pile of beads onto a clean surface or dish, then either dip the wet nail directly into the pile at a slight angle or use a small dotting tool to place beads individually for more control over pattern and density. Direct dipping covers more surface area faster but gives you less control over exact placement, which works well for a full, dense caviar effect across the whole nail. Individual placement with a tool takes longer but allows for patterns, gradients, or leaving negative space, useful if you're doing an accent design rather than full coverage. Gently press any loose beads with a clean, dry brush before curing to make sure they're seated into the gel rather than just resting on top.

Curing and the First Seal Layer
Cure the bead layer under your lamp for the full recommended time, checking that beads on the edges and corners of the nail, areas that often get slightly less direct light exposure, are fully set and not still soft to the touch. Immediately after curing, apply a thin sealing layer of clear gel that goes over the tops of the beads without pressing them down or disturbing their position, then cure again. This sealing step is what actually determines how long the texture survives daily wear, since beads without a sealing layer are essentially just resting in a shallow gel bed and will shed within days of normal hand use.

Why Beads Fall Off (And How to Prevent It)
Beads shedding early almost always traces back to one of two mistakes: applying them onto gel that had already started curing or self-leveling too much before the beads went on, or skipping the sealing layer after the initial cure. A gel layer left uncured for too long before bead application starts to flatten and lose its tacky grip, so beads placed even 20-30 seconds later than ideal won't seat as securely. If you notice beads coming loose within the first day or two rather than gradually over the full wear period, the sealing layer is almost certainly the missing step, and adding one retroactively over an already-finished set can often extend its life significantly.

Color and Pattern Combinations Worth Trying
A single-tone caviar effect, matte beads matching or closely complementing the base polish color, creates a subtle, textured monochrome look that reads as elevated rather than busy. Mixing two or three bead colors in a gradient, denser at the tip and sparser toward the cuticle, gives a more dynamic effect without overwhelming the whole nail in texture. For a more restrained approach, applying beads only along a single accent nail or in a small cluster near the cuticle keeps the trend's textural interest without committing an entire set to a finish that's genuinely different to wear than a standard smooth manicure. Testing a single accent nail first before committing to a full gradient or multi-color set is a low-risk way to see how a specific combination actually looks under your own lighting.

What Caviar Nails Feel Like Day to Day
The raised, textured surface is genuinely noticeable in daily activities, typing, especially, feels different with beads pressed against keys, and some people find the sensation takes a day or two to adjust to. The texture also means caviar nails pick up lint and small debris more easily than a smooth finish, particularly in pocket linings or when handling fabric. This isn't a flaw in application; it's simply an inherent tradeoff of the finish's raised surface, and it's worth knowing before committing a full set rather than starting with a single accent nail to see how the texture feels in your actual routine. Some people adapt within a day or two and stop noticing the texture at all, while others prefer keeping caviar beads to occasional wear rather than an everyday finish.

How Long a Well-Applied Caviar Set Lasts
With a proper sealing layer, caviar bead nails typically last close to the same 10-14 days as a standard gel manicure, though the texture itself tends to feel less prominent by the second week as beads on high-contact areas, the fingertip pads specifically, wear down or occasionally dislodge from repeated pressure. This partial wearing-down is normal and doesn't affect the rest of the set's structural hold. Removal follows the same acetone soak-off process as standard gel, since the beads themselves don't require any different removal technique beyond the standard soak time. Because the beads sit within the sealed gel layer rather than loosely on the surface, they soften and lift away during the soak just like the surrounding polish, without requiring any extra scrubbing or special care.

Shop the products in this look:
How do you keep caviar beads from falling off nails?
Apply beads to gel that's still wet and tacky rather than already curing, then seal them with a thin layer of clear gel after the initial cure. Skipping that sealing layer is the most common reason beads shed early.